How to asynchronously refresh elements in the Django admin with HTMX
Recently updated on

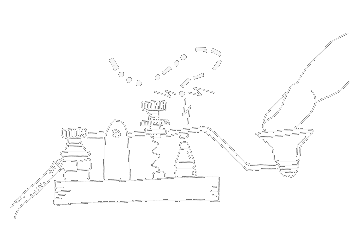
The client wanted a dropdown select box that, when changed, would trigger the repopulation of a separate multiselect box. In the mock-up below, the contents of the “Tags” picker changes depending on the value of the “Foo” dropdown. The element is refreshed via AJAX, so we avoid reloading the entire page.


Looking online for answers to the question “how do I dynamically refresh content in the Django admin?” turns up roll-your-own JavaScript solutions, possibly with the help of jQuery. Those solutions were great back in grandad’s day, but nowadays all the cool kids are using HTMX!
And HTMX is a great option for this problem. We can get the functionality we want without a single line of… well, let’s say with just a tiny bit of JavaScript. But HTMX will do all the heavy AJAX lifting for us. Let’s see how we can make it happen.
By the way, this post assumes some slight familiarity with HTMX. For example, I will not go into the function of each of the HTMX attributes we use below. However, we only need to understand the basics of HTMX to accomplish this task.
The post also assumes that you have a working knowledge of Django and that you have access to a Django project that you can make changes to. If you have the former but not the latter, create and activate a virtual environment, use “pip” to install a recent version of Django into it, and finally use $ django-admin startproject <my-project> to start a new Django project. Some other management commands you may or may not want to follow up with include:
$ ./manage.py migrate
to create the initial database tables (we’re assuming the file-based “sqlite3” database)
$ ./manage.py createsuperuser
to create a superuser for yourself, if you don’t have one already,
$ ./manage.py startapp foos
$ ./manage.py startapp bars
$ ./manage.py startapp tags
to create the three apps we’ll use in this demonstration. Make sure all three are included in the INSTALLED_APPS setting of your project. While you’re in there, you should probably also set the ALLOWED_HOSTS setting to ["*"] to allow your project to run on your local machine.
Once you’ve got this basic framework in place, continue reading below.
The Models
Ok, so assume for the sake of this blog post that “Foo” and “Bar” are the names of our base models. A “Bar” instance has a foreign key to a “Foo” instance. Finally, we have a third model named “Tag” that can be related to either Foo or Bar. All models are defined in the “models.py” modules of their respectively named apps, like so:
foos/models.py
from django.db import models
from tags.models import Tag


class Foo(models.Model):
    name = models.CharField(max_length=255)
    tags = models.ManyToManyField(Tag)

    def __str__(self):
        return self.name
bars/models.py
from django.db import models
from foos.models import Foo
from tags.models import Tag


class Bar(models.Model):
    name = models.CharField(max_length=255)
    foo = models.ForeignKey(Foo, on_delete=models.CASCADE)
    tags = models.ManyToManyField(Tag, blank=True)

    def __str__(self):
        return self.name
tags/models.py
from django.db import models

class Tag(models.Model):
    name = models.CharField(max_length=255)

    def __str__(self):
        return self.name
You can now run
$ ./manage.py makemigrations
and
$ ./manage.py migrate
to create the database tables for your new models.
The Admin
Our admins for the “foos” and “tags” apps can be simple too:
foos/admin.py
from django.contrib import admin
from .models import Foo

admin.site.register(Foo)
tags/admin.py
from django.contrib import admin
from .models import Tag

admin.site.register(Tag)
It’s the admin for the “bars” app where things start to get more involved. At a minimum, we know that our admin change view will need to load the HTMX library. To make that happen, we override the base template for the Django admin’s change view. Let’s create some template directories for the “bars” app and put the override there:
bars/templates/admin/base.html
{% extends "admin/base.html" %}
{% block extrahead %}
<script src="https://unpkg.com/htmx.org@1.9.9"></script>
{% endblock %}
That lone <script> tag is all we need for HTMX to work. Magic!
In your settings file, make sure that the APP_DIRS flag is set (“True”) in your TEMPLATES setting, and that your app (“bars” in our case) is listed before 'django.contrib.admin' in your INSTALLED_APPS setting. Without these details, Django won’t find your override template.
Now that our change view knows what HTMX is, we need to attach some HTMX attributes to the “select” dropdown for the “foo” field in the admin. That’s going to require a custom change form, so let’s start there. We’ll define it in the “admin.py” module of the “bars” app:
bars/admin.py
from django import forms
from django.contrib import admin
from django.urls import reverse_lazy
from .models import Bar


class BarAdminForm(forms.ModelForm):

    class Meta:
        htmx_attrs = {
            "hx-get": reverse_lazy("bars:get_tags_for_foo"),
            "hx-swap": "innerHTML",
            "hx-trigger": "change",
            "hx-target": "#id_tags",
        }
        model = Bar
        fields = "__all__"
        widgets = {
            "foo": forms.Select(attrs=htmx_attrs),
        }


class BarAdmin(admin.ModelAdmin):
    form = BarAdminForm

admin.site.register(Bar, BarAdmin)
A View and Another Template
Notice that our “hx-get” attribute above references a view in the “bars” app (“get_tags_for_foo”). That view will return the tags related to the given “Foo” instance. We can then populate our multiselect widget with those values. Here’s the view:
bars/views.py
from django.views.generic import ListView
from foos.models import Foo, Tag

class GetTagsForFoo(ListView):
    model = Tag
    template_name = "bars/tag_choices.html"

    def get_queryset(self):
        if foo_id := self.request.GET.get("foo"):
            try:
                foo = Foo.objects.get(pk=foo_id)
            except Foo.DoesNotExist:
                pass
            else:
                return foo.tags.all()
        return Tag.objects.none()
The template for this view is just:
bars/templates/bars/tag_choices.html
{% for tag in object_list %}
<option title="{{ tag.name }}" value="{{ tag.id }}">{{ tag.name }}</option>
{% endfor %}
(The generic “ListView” will populate “object_list” for us.)
Wiring Up the URLs
As Django users will know, you must also connect this view to a URL in “bars/urls.py” and connect *that* module to the “urls.py” of your main project.
bars/urls.py
from django.urls import path

from . import views

app_name = "bars"  # url namespace
urlpatterns = [
    path("tags-for-foo/", views.GetTagsForFoo.as_view(), name="get_tags_for_foo"),
]
urls.py (main project)
from django.conf.urls import include
from django.contrib import admin
from django.urls import path

urlpatterns = [
    path("bars/", include("bars.urls")),
    path('admin/', admin.site.urls),
]
Go Time
Now with everything in place, you should be able to start runserver on port 8000. To see the dynamic loading in action ala the screenshots at the beginning of this post, go to
http://localhost:8000/admin/
and log in as your superuser. Then:
- Create multiple “Tag” instances at http://localhost:8000/admin/tags/tag/add/
- Create a “Foo” instance at http://localhost:8000/admin/foos/foo/add/ and associate it with some tags.
- Create another “Foo” instance and associate it with different tags.
- Create a “Bar” instance at http://localhost:8000/admin/bars/bar/add/ and watch as your “tag” choices magically repopulate when you change the value of the “Foo” dropdown.
Fine Tuning
Hopefully, HTMX is working its magic on the “Foo” dropdown, but our form could use some tweaking. For example, the initial load of the form offers all “Tag” instances as choices, even though it should only offer those tags related to the chosen “Foo” instance. We might also like to prevent the user from changing the selected “Foo” if tags have already been chosen. This will help to ensure that any tags related to a given “Bar” instance are also related to the chosen “Foo” instance.
To add these nice features, you can override the __init__() method of your custom form and the `get_readonly_fields()` method of your custom admin. Now the admin module will look like this:
bars/admin.py
from django import forms
from django.contrib import admin
from django.urls import reverse_lazy
from foos.models import Foo
from .models import Bar


class BarAdminForm(forms.ModelForm):

    class Meta:
        htmx_attrs = {
            "hx-get": reverse_lazy("bars:get_tags_for_foo"),
            "hx-swap": "innerHTML",
            "hx-trigger": "change",
            "hx-target": "#id_tags",
        }
        model = Bar
        fields = "__all__"
        widgets = {
            "foo": forms.Select(attrs=htmx_attrs),
        }

    def __init__(self, *args, **kwargs):
        foo = None
        super().__init__(*args, **kwargs)
        # If this is a POST request (i.e. 'self.data' is populated), then set the queryset
        # for the 'tags' field to the tags associated with the Foo that was selected. This
        # allows the form to validate.  If this is a GET request, then set the queryset to
        # the tags associated with the Bar instance that is being edited, if any. This
        # allows the initial state of the field to be set correctly.
        foo_id = self.data.get("foo") or self.initial.get("foo")
        if foo_id:
            try:
                foo = Foo.objects.get(pk=foo_id)
            except Foo.DoesNotExist:
                pass
        elif self.instance.id:
            foo = self.instance.foo

        if foo:
            self.fields["tags"].queryset = foo.tags.all()
        else:
            self.fields["tags"].queryset = Tag.objects.none()


class BarAdmin(admin.ModelAdmin):
    form = BarAdminForm

    def get_readonly_fields(self, request, obj=None):
        # The user can only change the Foo instance if this Bar instance has no tags.
        if obj and obj.tags.count() > 0:
            return ["foo"]
        return []


admin.site.register(Bar, BarAdmin)
Final Words
Of course there are other tweaks you can make to make your custom form even nicer. A big one would be to use the Django admin’s “filter_horizontal” widget for the tag selector, as this is much more intuitive than the simple multi-select widget in our examples here. That widget comes with its own complications though, as changing its contents dynamically causes lots of problems with its own javascript-based functionality. Still, it can be done! I’ll leave it as an exercise for the reader to figure out how.
Happy coding!
Need Upgrade Assistance?
Django 3.2 reaches its end of life in April 2024. If your site is on this or an earlier version, please fill out this form and we will reach out and provide a cost and time estimate for your consideration. No obligation.

 of value from this post, would you please take a sec and share it? It really does help.